Brightly coloured, synthetic bath buffs and kitchen scrubbers are a familiar sight, but growing your own natural sponges will provide you with a supply of more planet-friendly alternatives.
The origin of loofahs is sometimes confused with that of sponges derived from ocean-dwelling animals.
Natural loofah sponges actually come from the fruits of vine-growing Luffa plants. These plants are part of the gourd family (Cucurbitaceae) making them relatives of watermelons, cucumbers and pumpkins. When a luffa fruit dries out and is peeled, you are left with its fibrous interior, which can be used as a sponge.
Watch the video above to find out how to grow loofah sponges in the UK. You can find the full instructions and get tips for taking on this gardening project below.
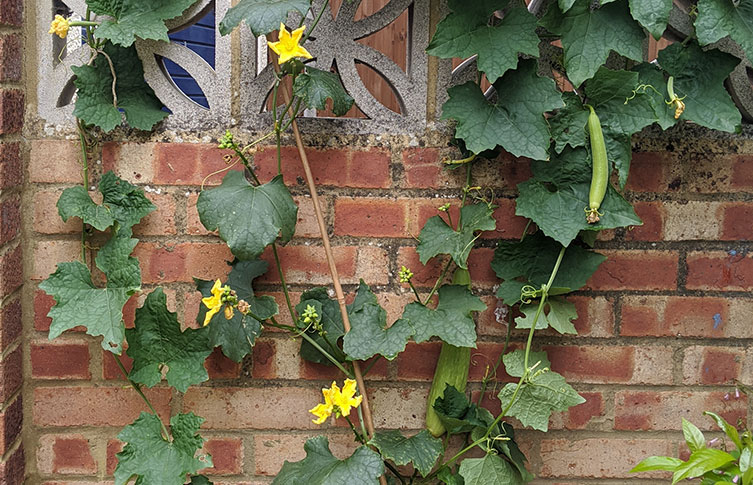
Luffa plants have tropical origins but it is possible to grow them in more temperate regions
To grow a luffa plant you will need:
- Luffa seeds
- Compost
- Small plant pots
- Large clear plastic box with a lid
- Large plant pots or grow bags
- Secateurs
- Twine and canes (optional)
- Thermometer (optional)
1. Source your luffa seeds. They're easily found online and your local garden centre may also stock them.
You will commonly come across the species Luffa cylindrica, also known as the smooth luffa or sponge gourd. Some stores may label them under their alternative scientific name Luffa aegyptiaca or simply as luffa seeds.
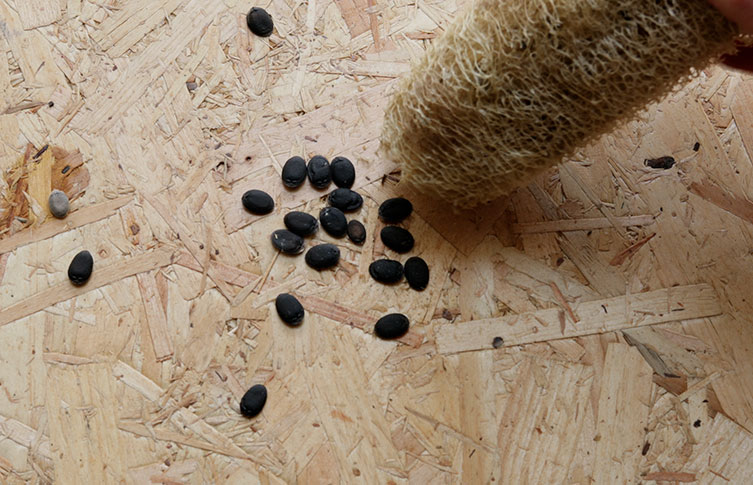
You can purchase seeds online and at garden centres, but if you have grown luffa plants before, you could use the seeds collected from a previous harvest
2. In late March or early April, fill small pots with compost and bury the luffa seeds 1.5-2 centimetres deep. Water them well.
If you are in the UK, place the pots indoors, inside a large plastic box. It's best to put the box in a sunny spot with the lid on top but propped open.
Germination happens between 25-30°C and takes about 20 days. You could use a thermometer placed in the box to keep track of the temperature inside.
3. Carefully repot your plants in grow bags or large pots outdoors once they have a few leaves and the risk of frost has passed.
Place the plants against a sheltered but sunny wall or trellis. As the plants grow you could use twine and canes to help support rambling branches.
Keep the compost moist but try not to overwater the plants. Yellow flowers will soon emerge, and then long green fruits will begin to grow.
4. Leave the fruit to turn brown and dry out on the vine. When they have, use a pair of secateurs to harvest the fruit.
Peel the tough exterior skin away to reveal the fibrous interior - this is the loofah sponge - and shake out the seeds. Keep the seeds safe and dry so that you can grow a new crop of luffa plants next year.
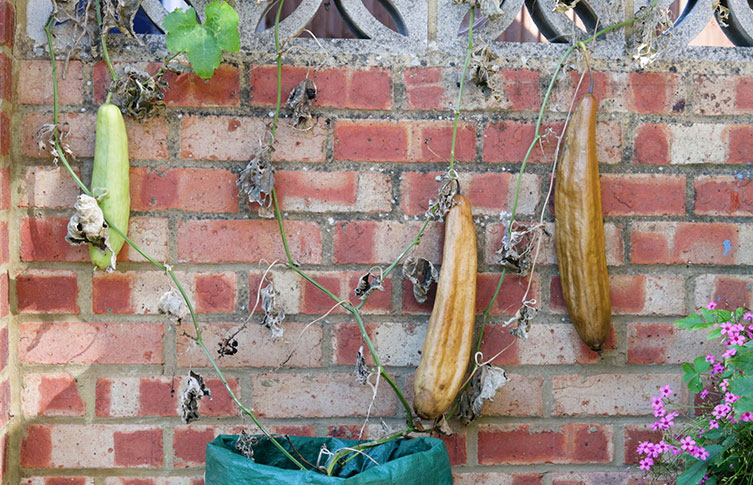
Wait for the luffa fruits to go brown on the vine before harvesting them
5. Wash the loofah in warm water and allow it to dry before using it for the first time.
6. Use your new loofah as an exfoliating bath sponge or for washing up in the kitchen. You can use the sponge whole or it can be easily cut into rounds or flat pads, depending on your needs.
Can you grow loofah sponges in the UK?
Luffa plants have been cultivated for centuries. Precisely where they originated isn't known, though the plants are thought to have been domesticated in Asia. These gourds are generally agreed to have tropical origins, but it is possible to grow them in more temperate regions like the UK.
It takes a long time for luffa plants to grow and for the fruit to ripen. If you plant the seeds in late-March or early April, you should have loofahs ready to harvest in mid-September.
Tips for growing loofah sponges
To maximise your chances of a successful crop of loofahs, here are a few tips for success.
Where to grow luffa plants
In cooler climates, it is best to start growing your luffa plants indoors to prevent them being damaged by frost.
These plants need consistent temperatures of between 25-30°C to germinate. You can achieve this by keeping them in a warm, sunny spot - such as by a south facing window - and starting them out in a large plastic container with a lid propped open to keep the heat in. It can take about 20 days for the seeds to germinate, though some gardeners have noted it can take longer.
Once your luffa seedlings have grown their first few leaves, you can carefully transplant them into slightly larger pots, but keep them indoors until the risk of frost has passed.
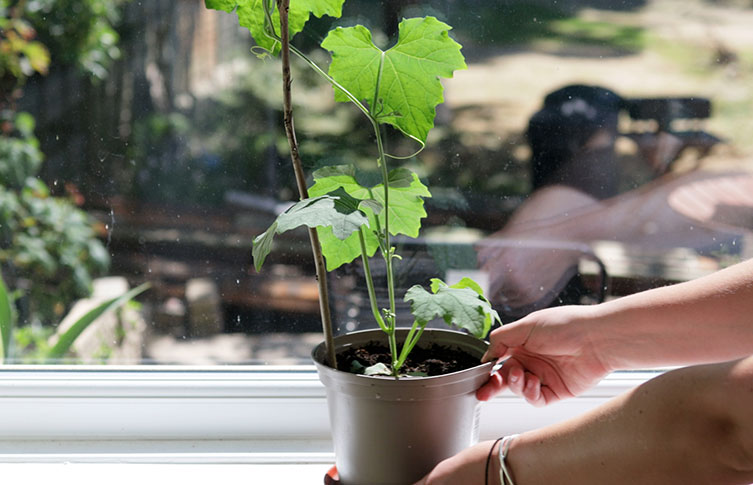
Keep the luffa plants indoors until the risk of frost has passed
Before you move your luffa plants into large pots outdoors full time, acclimatise them to the cooler temperatures by placing them in a sunny spot outdoors during the day and then bringing them back indoors at night. This process is known as hardening off and can be done over 10-14 days.
It is best to pot your luffa plants against a sturdy vertical surface such as a wall, fence or trellis. As they grow, the vines of the luffa plant will grab onto these. You can also help support rambling vines with canes and twine.
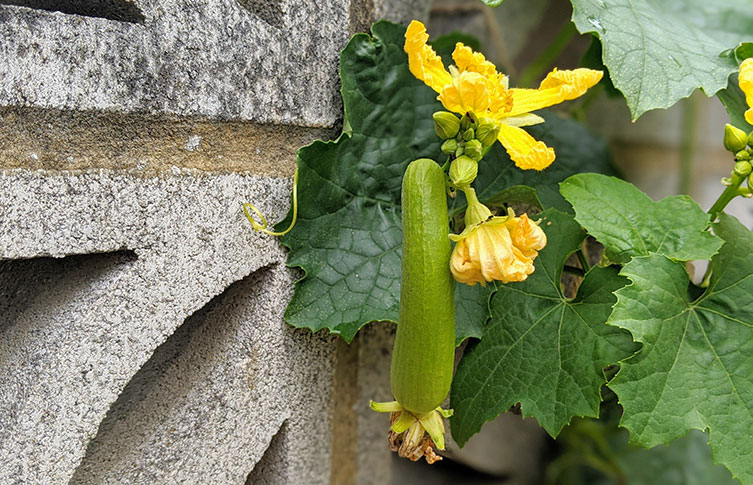
Luffa plants produce yellow flowers and then the green fruit will begin to appear
These plants benefit from being kept in a spot that is exposed to sunlight for as much of the day as possible.
Harvesting luffa fruits
By June, yellow flowers and some tiny fruit will likely have begun to appear. These will develop into larger green fruits by August - ours were about 20 centimetres long.
The fruits are initially green, but eventually turn brown - this will happen by about mid-September. It is best to pick them at this last stage, when they have dried out on the vine. We harvested 4-6 fruits per plant.
Try to pick the fruit before the first frost of the year hits. But if the weather turns cold and there are fruits that have not fully dried out, you should pick these and finish drying them indoors to prevent them from rotting.
Peel the brown skin off the fruit and you will be left with just its spongy, fibrous internal structure. If you are struggling to remove the skin, try gently squeezing the fruit to help the skin separate from the fibres. Some growers also recommend letting tough-to-peel loofahs soak in water to make removing the skins easier.
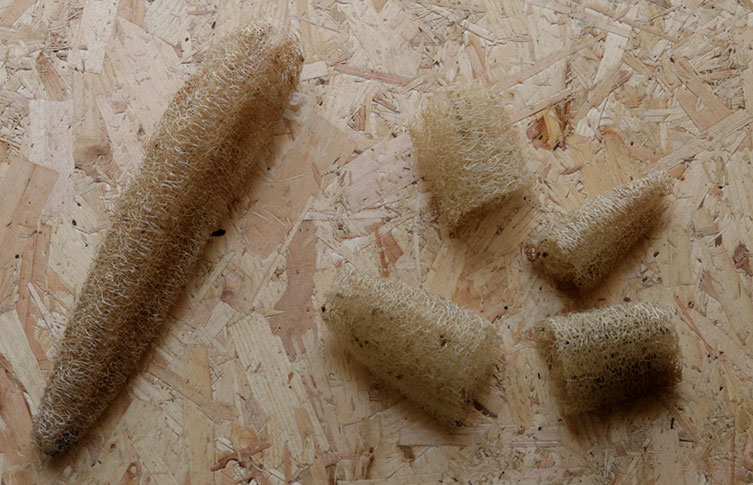
Peel the brown luffa fruit to reveal the fibrous loofah sponge
Make sure to wash your new loofah in warm water. You should start to notice the sponge becoming more flexible as it takes up water. Leave the sponge to dry fully before using it for the first time.
Saving luffa seeds for next year
Before you use your loofahs, make sure to collect all the seeds. These should tumble out of dried and peeled luffa fruits if you give them a few taps on a hard surface.
Dry the seeds out at room temperature and save them to plant a new crop of luffa plants next year.
Choosing to grow loofahs as a sustainable swap for synthetic sponges is a summer-long gardening project. In the meantime, find out what other changes you could try out to be kinder to the planet.
Protecting our planet
We're working towards a future where both people and the planet thrive.
Hear from scientists studying human impact and change in the natural world.

Do your bit for nature
Biodiversity is connected to almost every aspect of our lives, but it needs our help. Small actions can make a big difference.


Don't miss a thing
Receive email updates about our news, science, exhibitions, events, products, services and fundraising activities. We may occasionally include third-party content from our corporate partners and other museums. We will not share your personal details with these third parties. You must be over the age of 13. Privacy notice.
Follow us on social media